General information
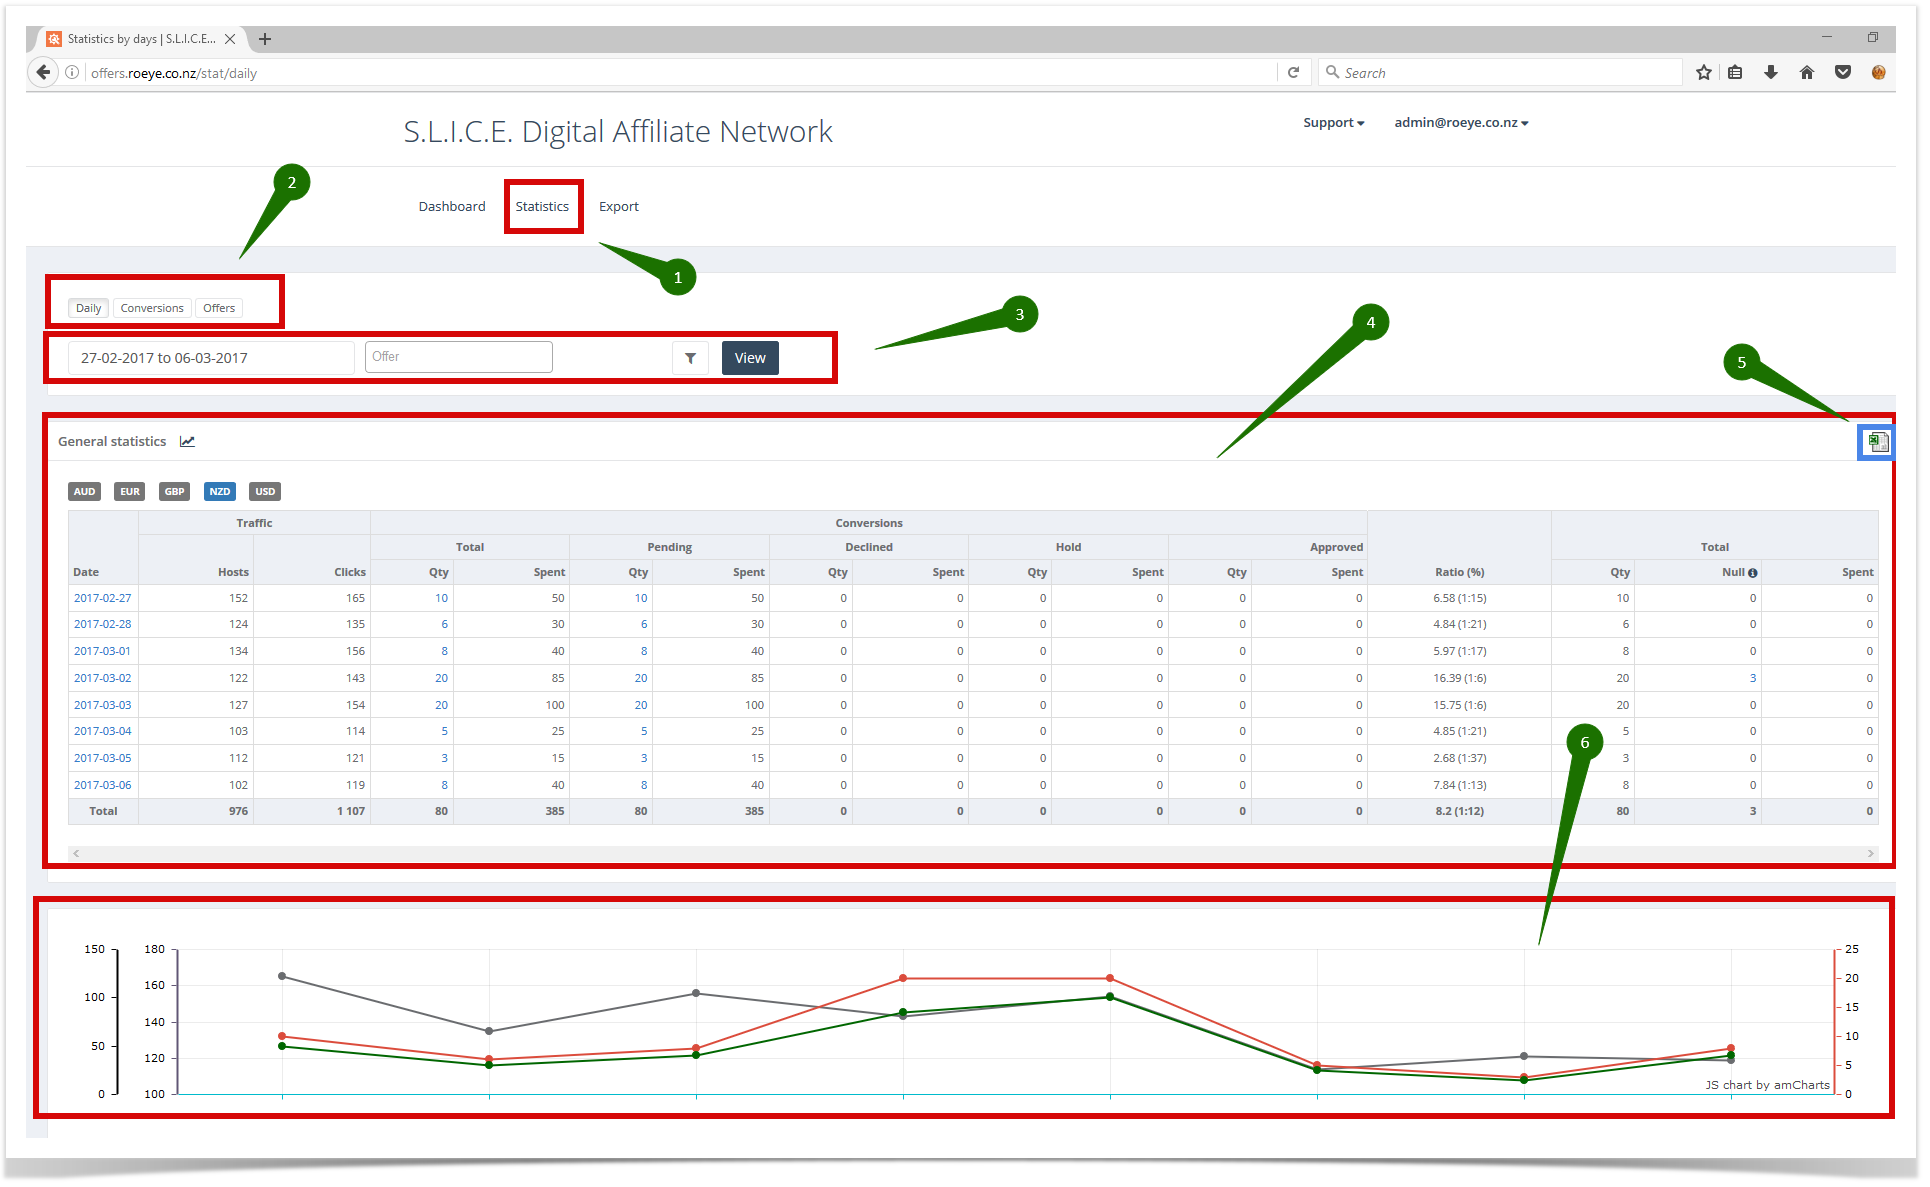
You can find your traffic stats using the menu item "Statistics" (1) or this direct link here: https://offers.slice.digital/stat/daily
There are 3 types of statistics in the system (accessible from the second menu (2)):
- Daily - summarised stats (https://offers.slice.digital/stat/daily)
- Conversions - detailed stat for every conversion/transaction (https://offers.slice.digital/stat/conversions)
- Offers - summarised stats for offers (campaigns) (https://offers.slice.digital/stat/offers)
On your stats page you can find several blocks:
- custom filters (3) - specify dates interval and/or offers to show
- stats table (4)
- export button (5)
- graphs (6)
Daily stats
Daily stats indicate summarised stats grouped by days. There are following important blocks:
- Dates
- Traffic stats - Clicks - overall clicks per day, hosts - unique clicks/visitors per day
- Conversions - conversions and costs ('Spent' column per day). Total amount and sum grouped by conversions statuses (Approved/Pending/Declined + Hold)
- Ratio rates
- Total - total values per day ('Null' - indicates conversions that were declined automatically using system filters)
- Currency block - display conversions and costs with selected currency only
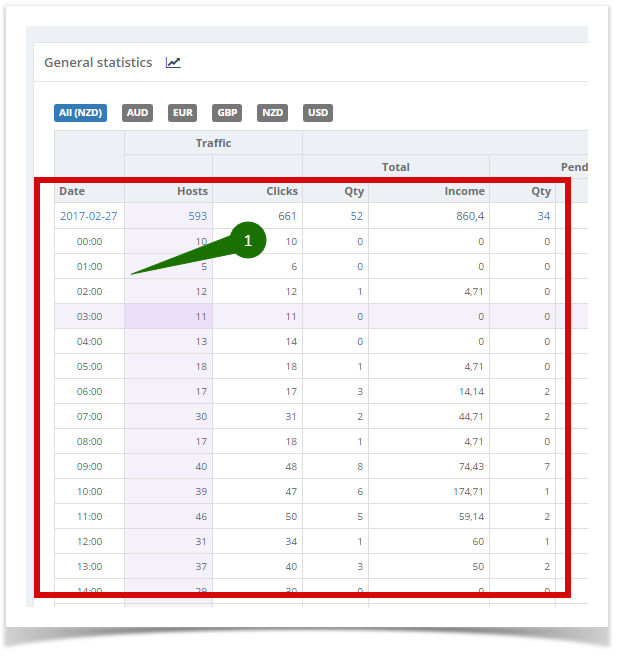
Also, you can find that dates and conversions numbers in the stats table are clickable. If you click on the conversions number (1) you will be redirected to the conversions stats page with selected filter for this day. If you click on the date you will see additional table with detailed stats for that day grouped by hour (2) - currently this function is under maintenance.
Conversions stats
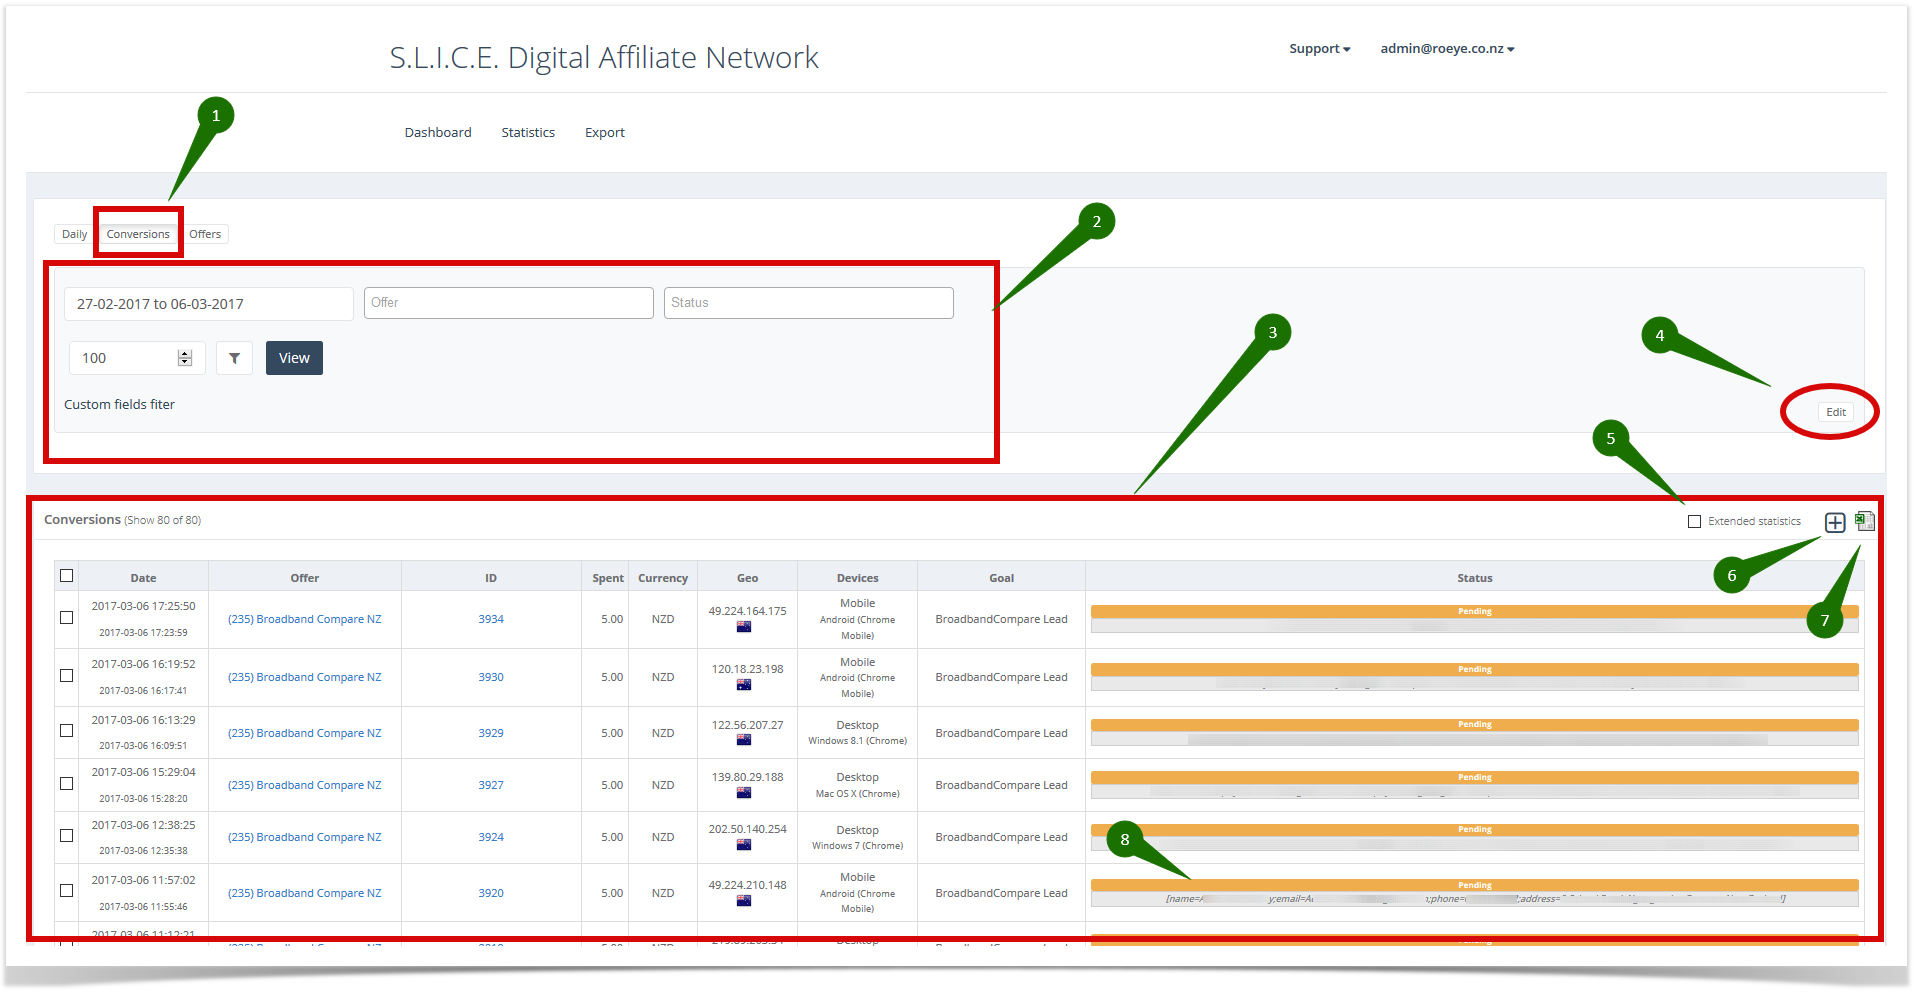
Conversions stats page has the following blocks:
- filters (2)
- conversions details table (3) with data:
- date (conversion date + click date)
- offer name
- conversion ID (order ID/transaction ID) - you can click on the ID this will redirect you to the dedicated page with comprehensive information about this particular conversion
- affiliate payout
- currency
- GEO (IP + Country flag)
- device information
- goal name (Lead or Sale or other)
- Status + notice (you can pass any notice information in the 'afcomment' field in the pixel)
- Edit button (4)
- Checkbox for extended stats (5)
- Manual conversions upload (6) - you can upload your sales manually from this section
- Export button (7)
Validating conversions
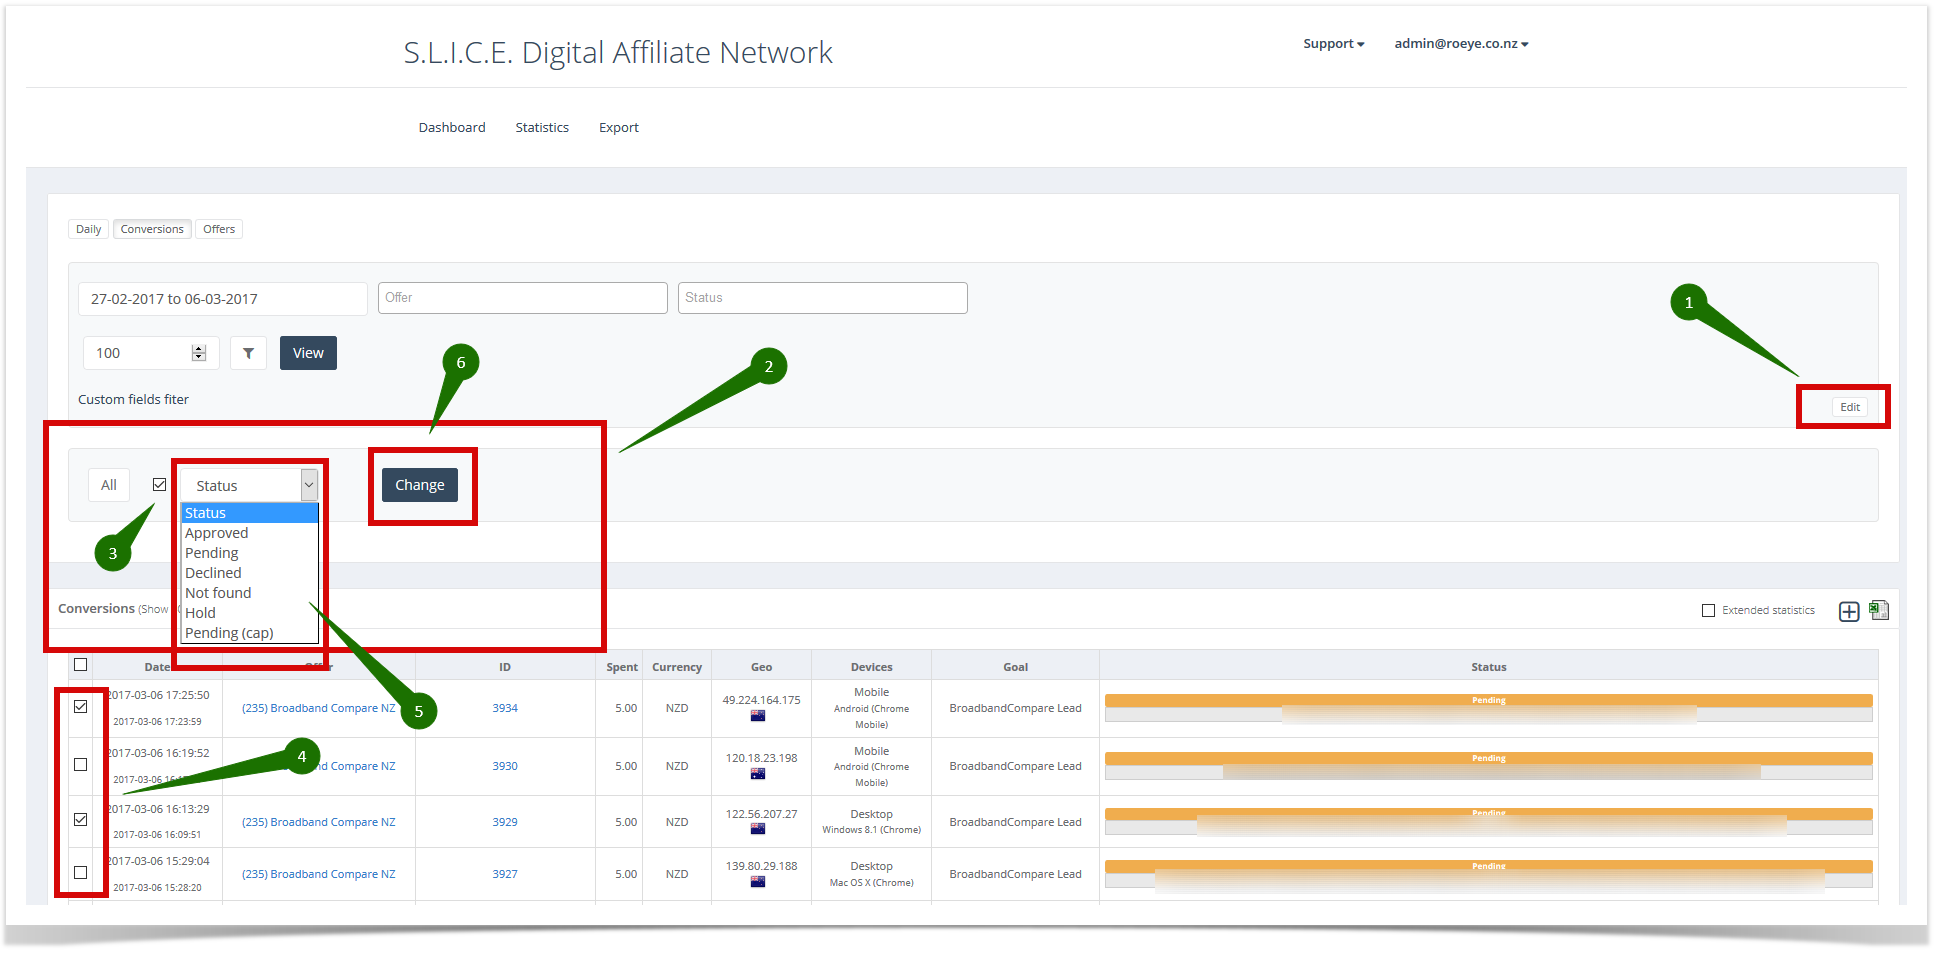
The most important thing for advertiser here is ability to validate conversions. You need to press 'Edit' button (1) to get an access to the additional block (2) with the validation functions. First, you need 'to turn on' the access ticking the checkbox (3). After that, select conversions you want to change status (4). Select the status from the following list (5):
- Approved - conversion is validated, affiliate commission will be paid
- Pending - conversion is not finalized
- Declined - conversion rejected, affiliate commission will NOT be paid
- Not found - conversion was not found in the advertiser system
- Hold - do not use
- Pending (cap) - do not use
Do not forget to press the button 'Change' (6) after all. Refresh the page and statuses will be changed.
Checking extended stats
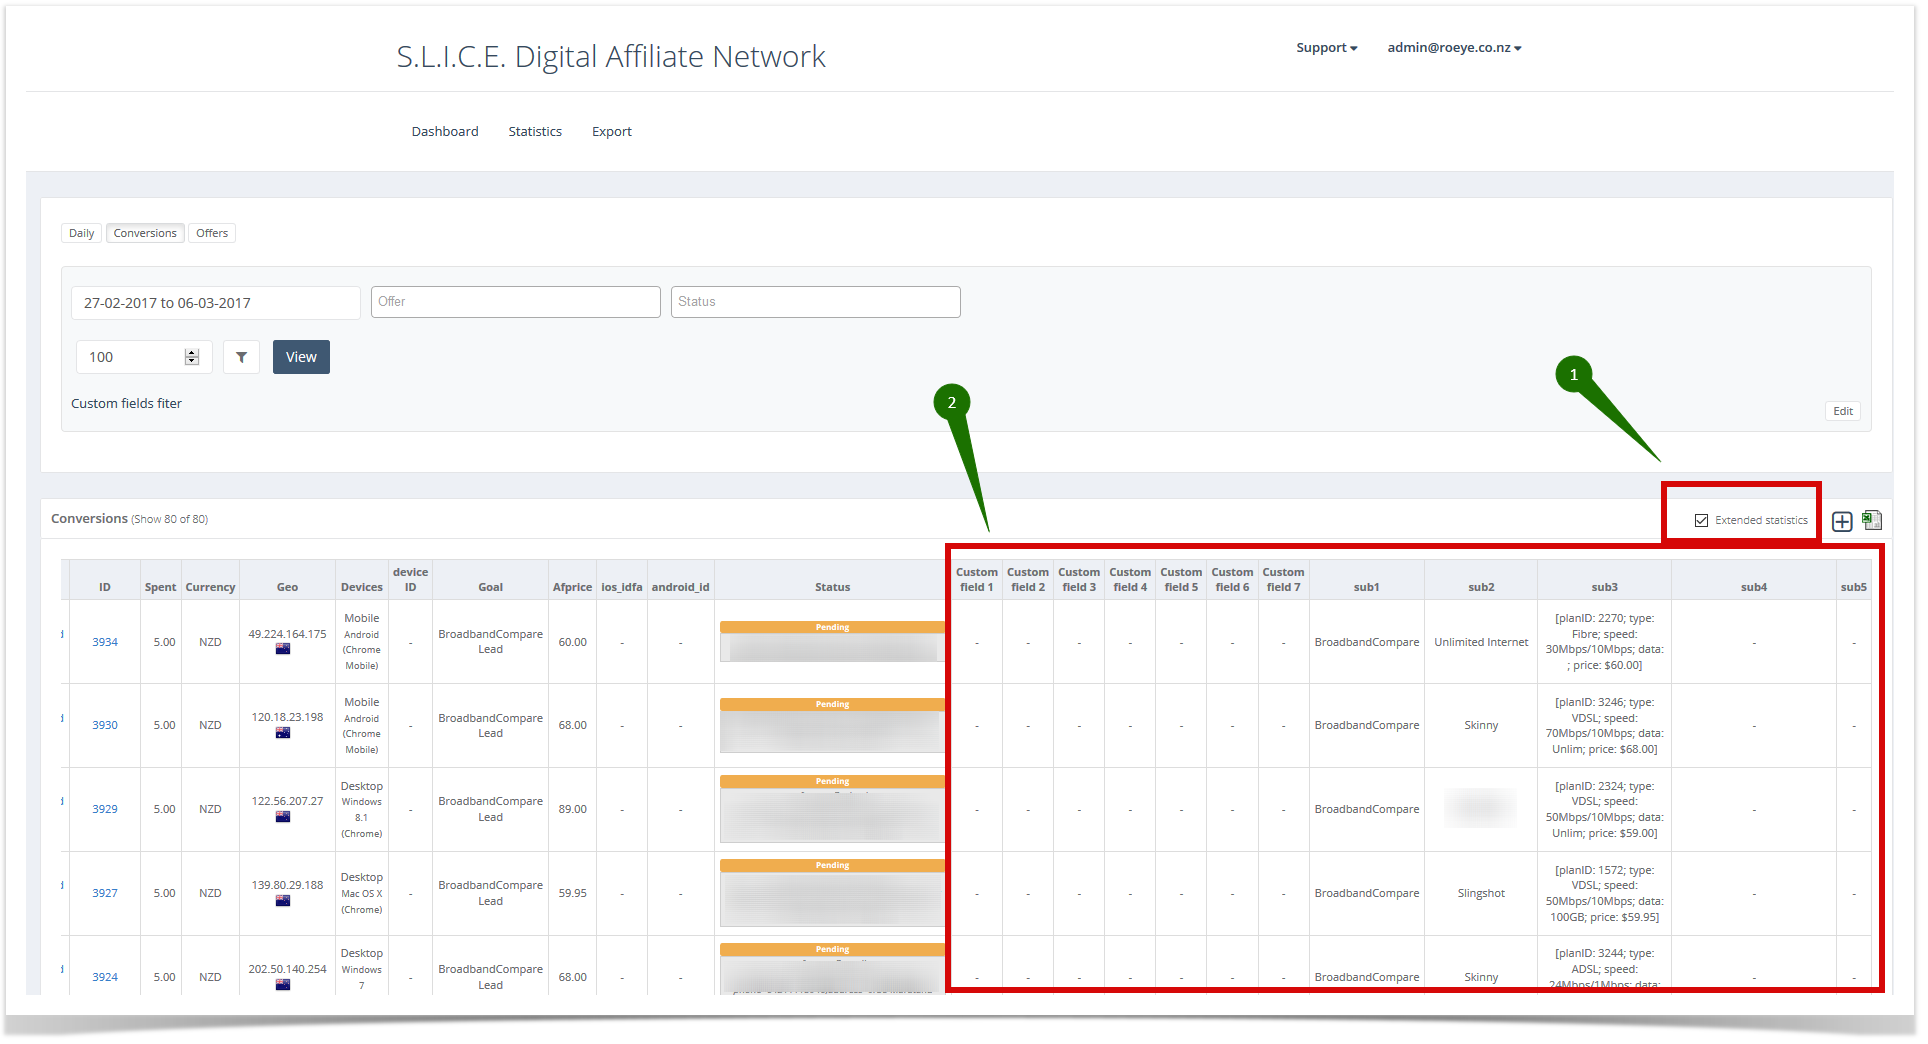
Also, you can see the extended stats (2) by ticking 'Extended statistics' checkbox (1):
- Custom fields (1-7) you can pass to tracker if you use postback instead of pixel.
- sub1-sub5 - Affiliate SubIDs that were added to the tracking link
Conversion import
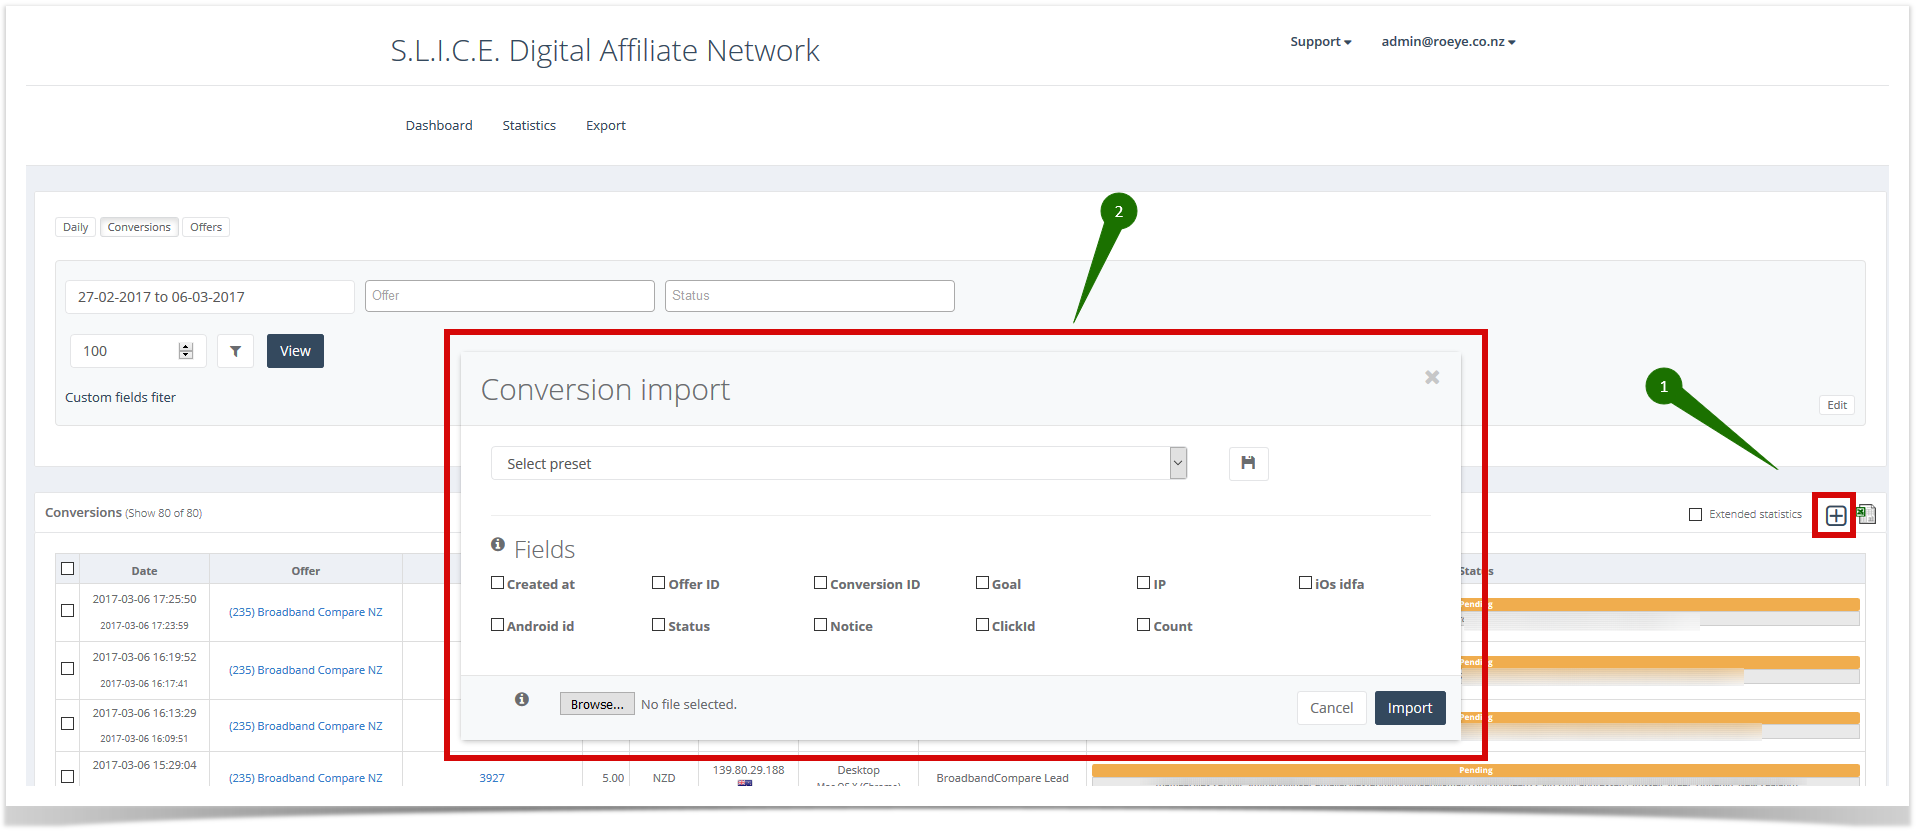
If you want add conversions manually you can use 'Conversion import' (1) tool. Here you can upload CSV file (CSV only - no XLS/XLSX/XML, sorry) with selected fields (2). Please, use semicolon as a delimiter. Also, you can save selected fields into presets and chose this saved preset later.
Conversion export
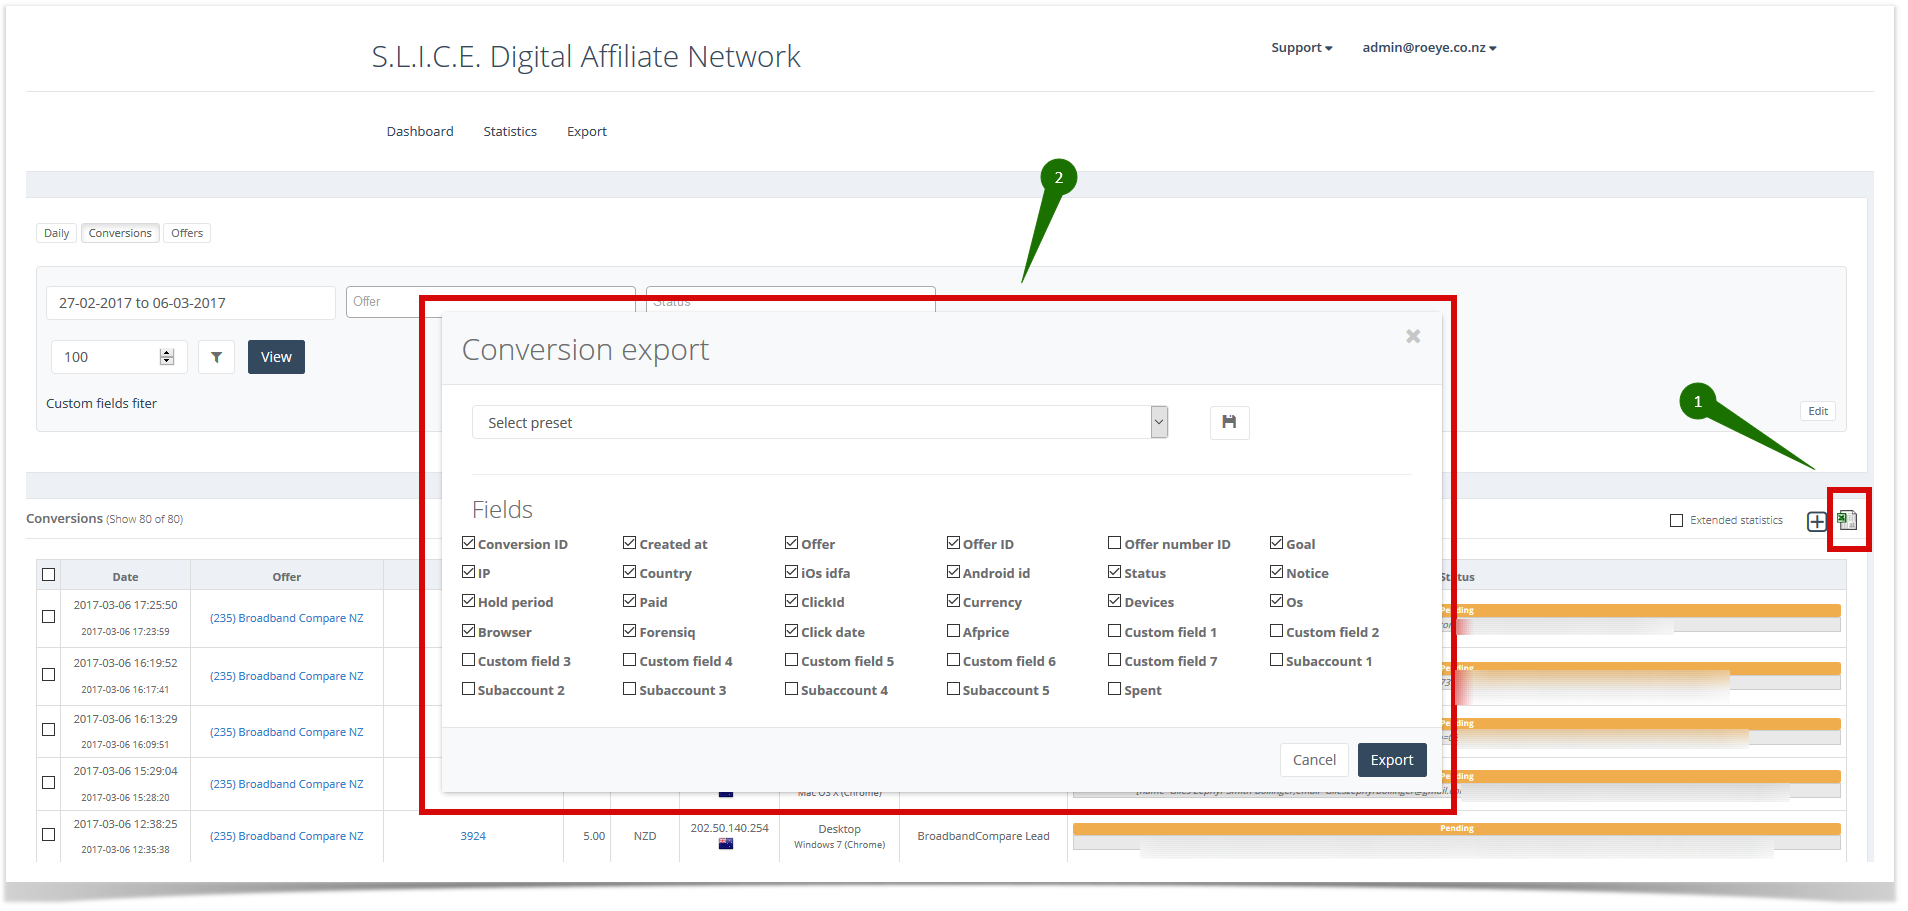
Of course, you can export conversions into CSV file using 'Conversion export' tool (1). Select fields you would like to see into your file (2) and press 'Export' button. Also, you can save selected fields into presets and chose this saved preset later.
