Take the offer from the Post Affiliate Pro
Connect the offer
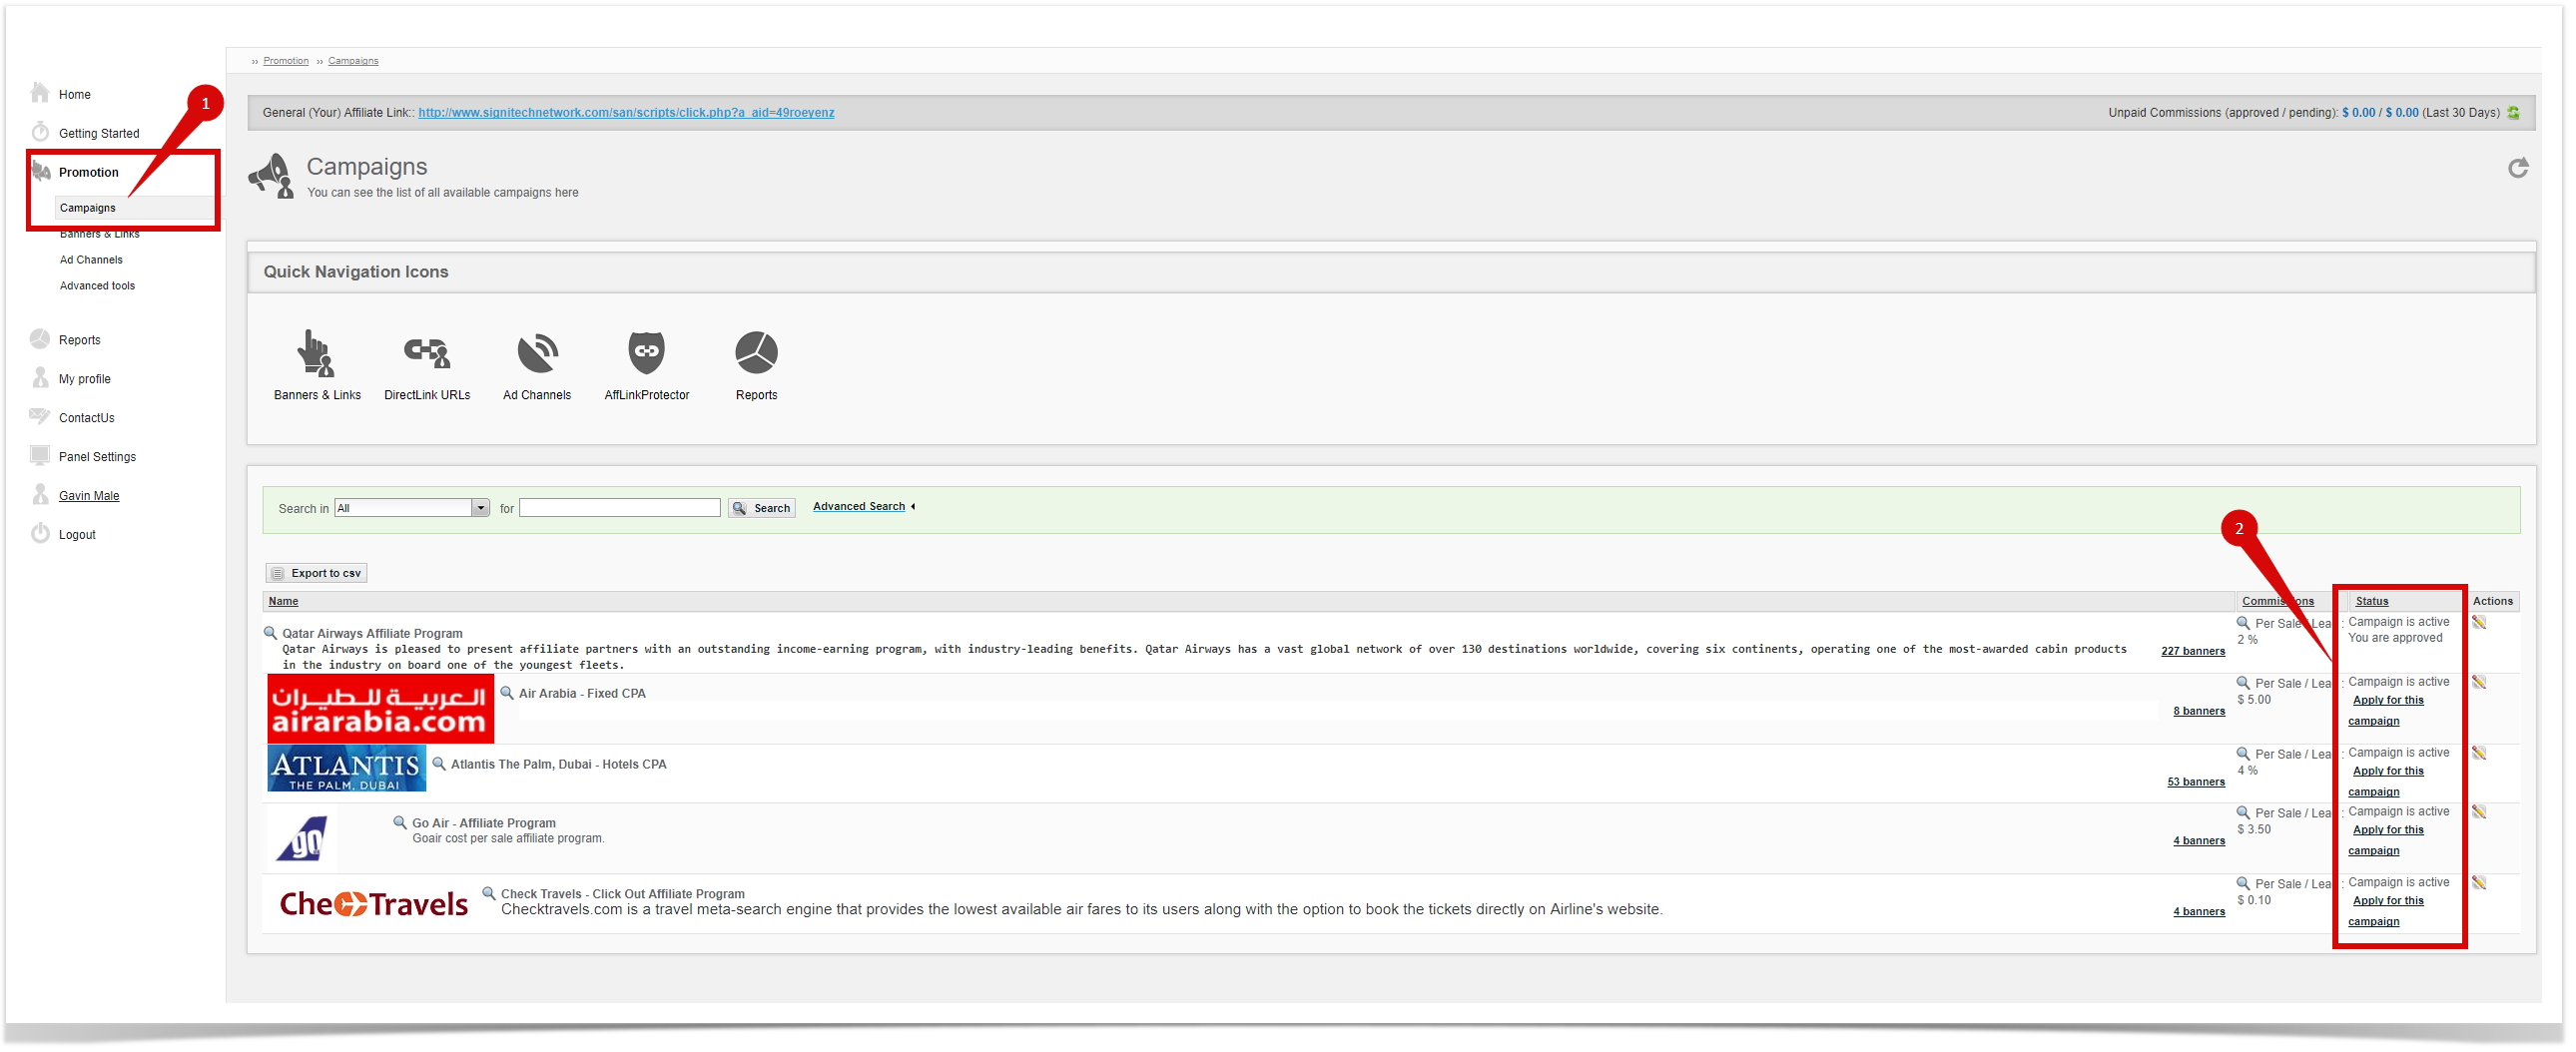
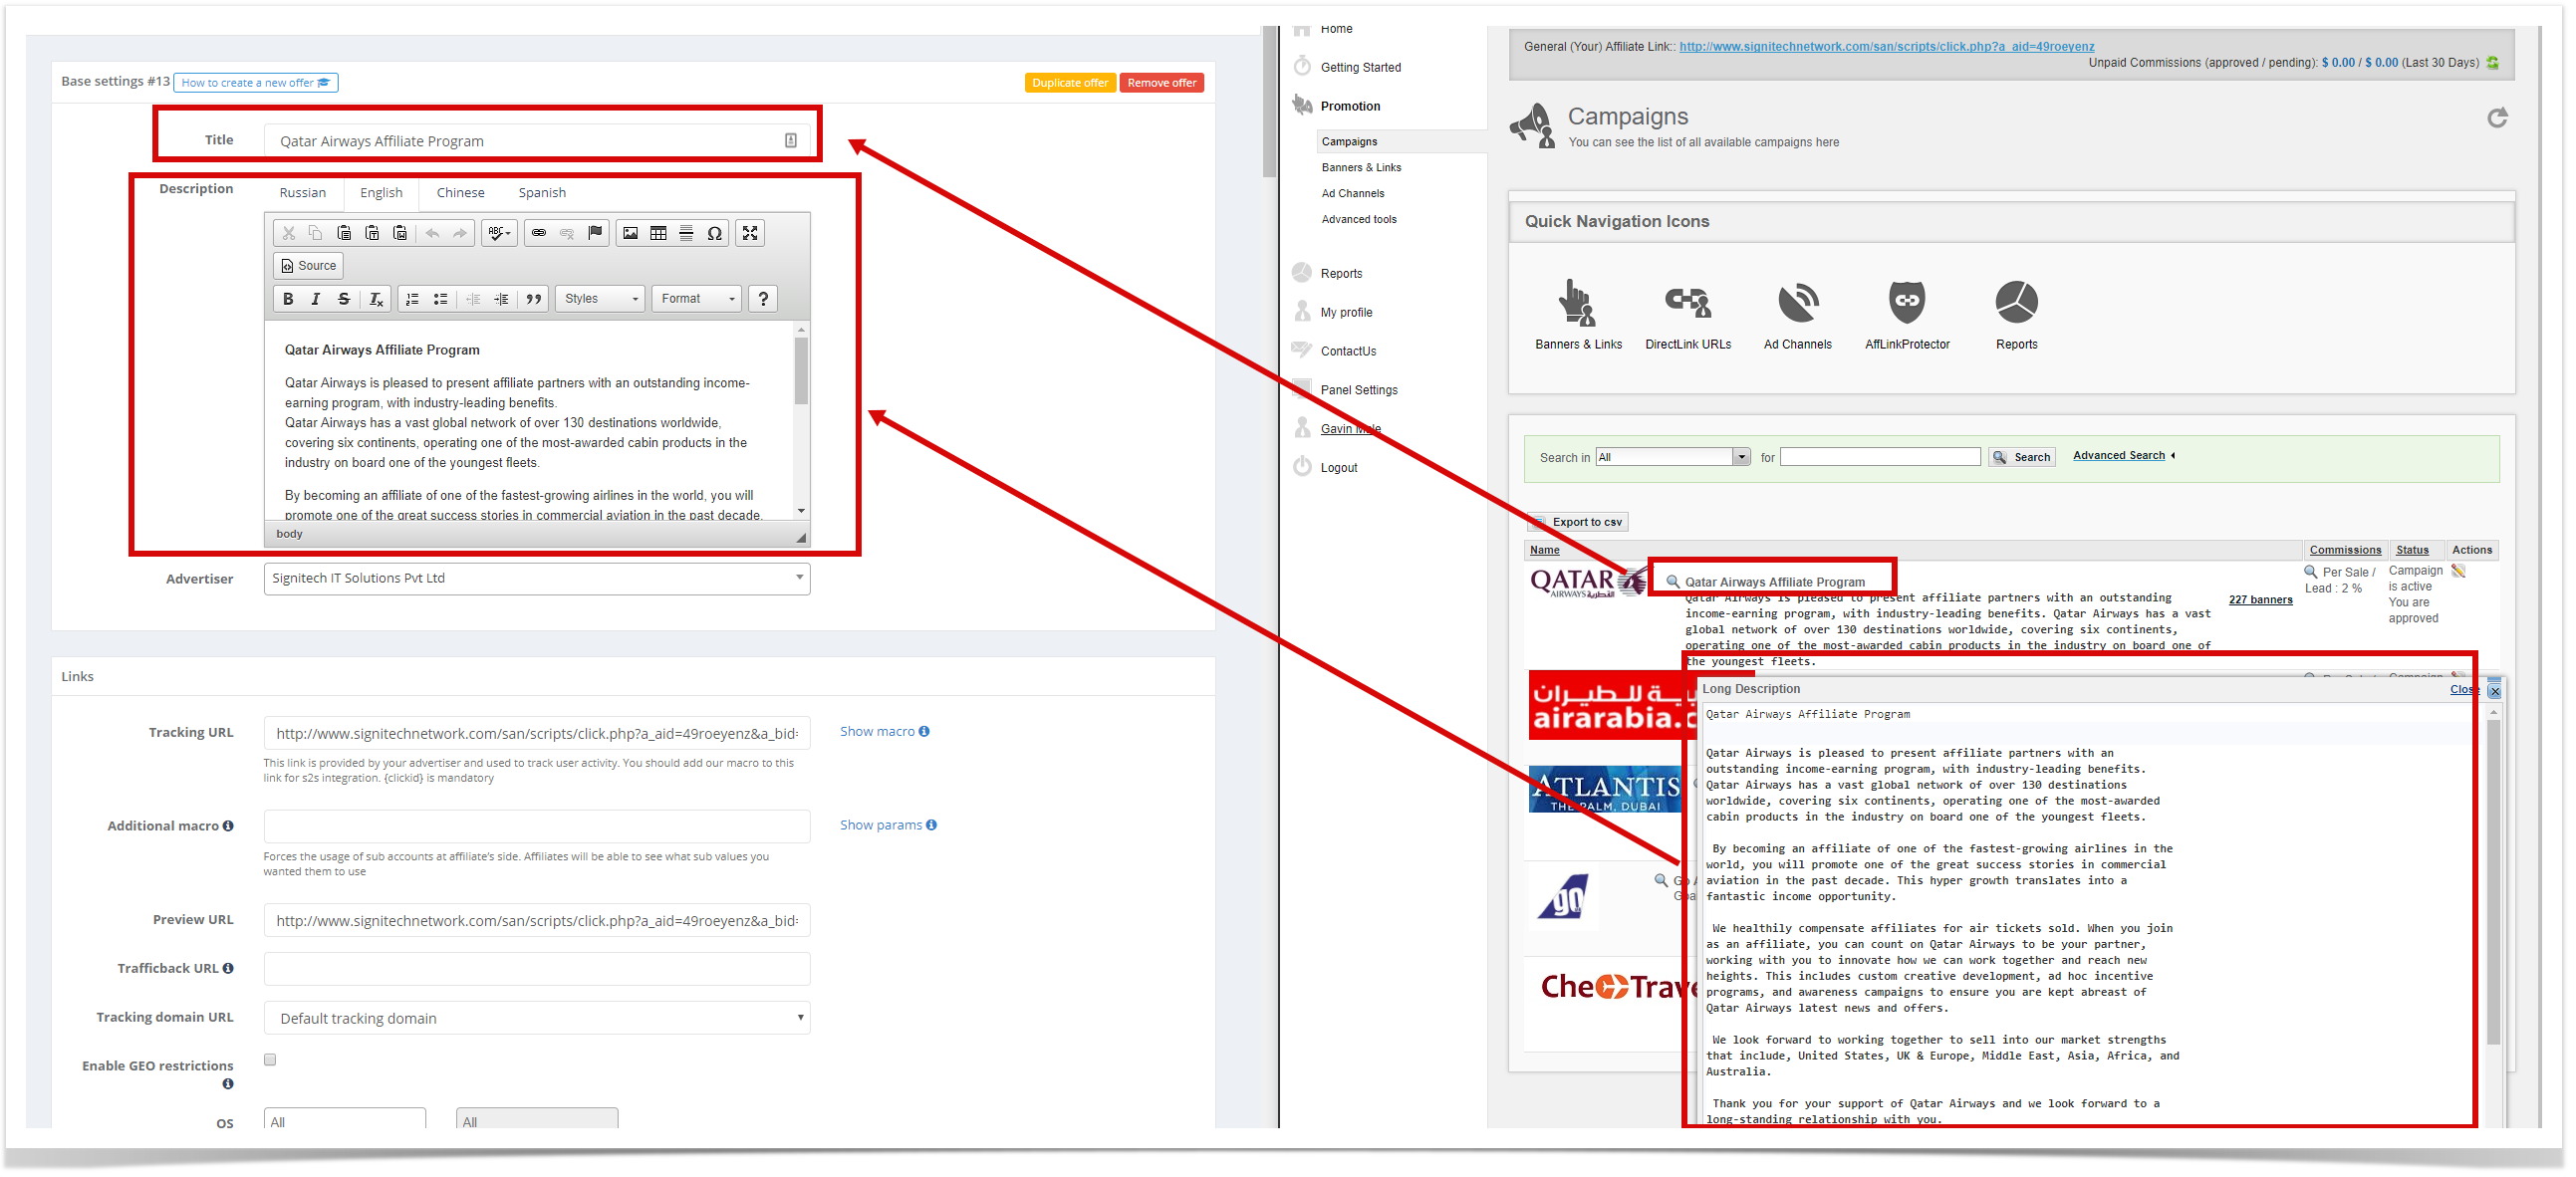
Go to "Campaigns", chose the program, and click "Apply for campaign".
Description
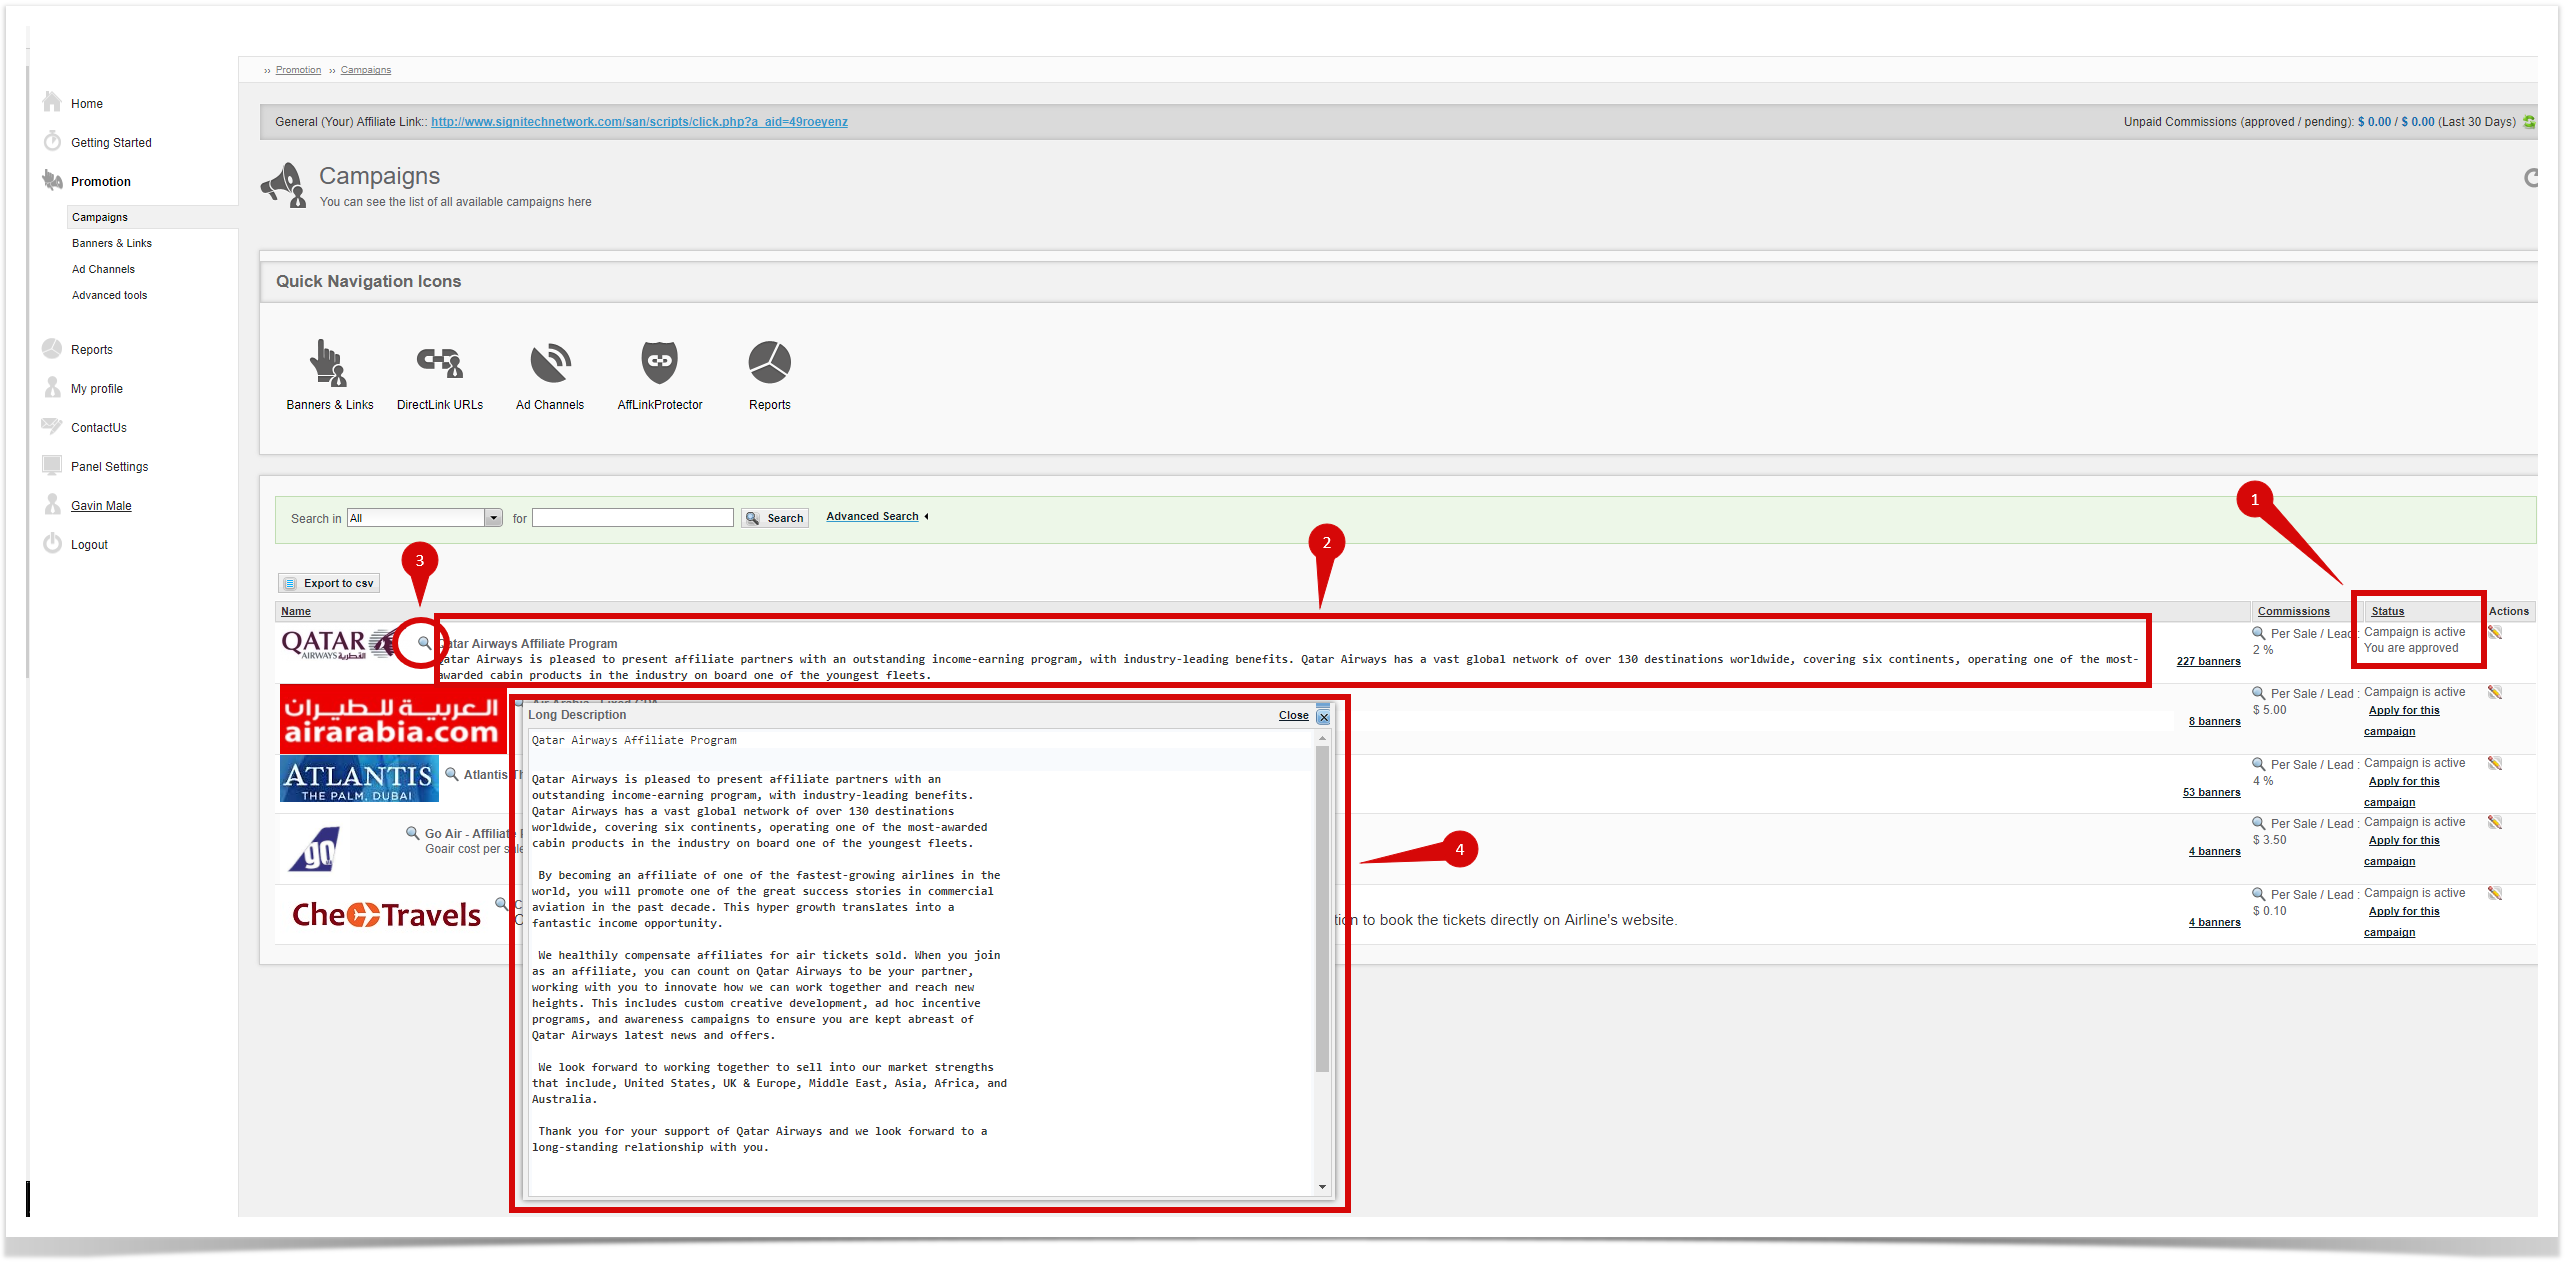
There are 2 types of description available: short description (2) and long description (4). Press Zoom icon (3) to display the long description:
Limitations
Limitations can be found from description.
Payouts
Commission can be found from "Commissions" column:
Creatives
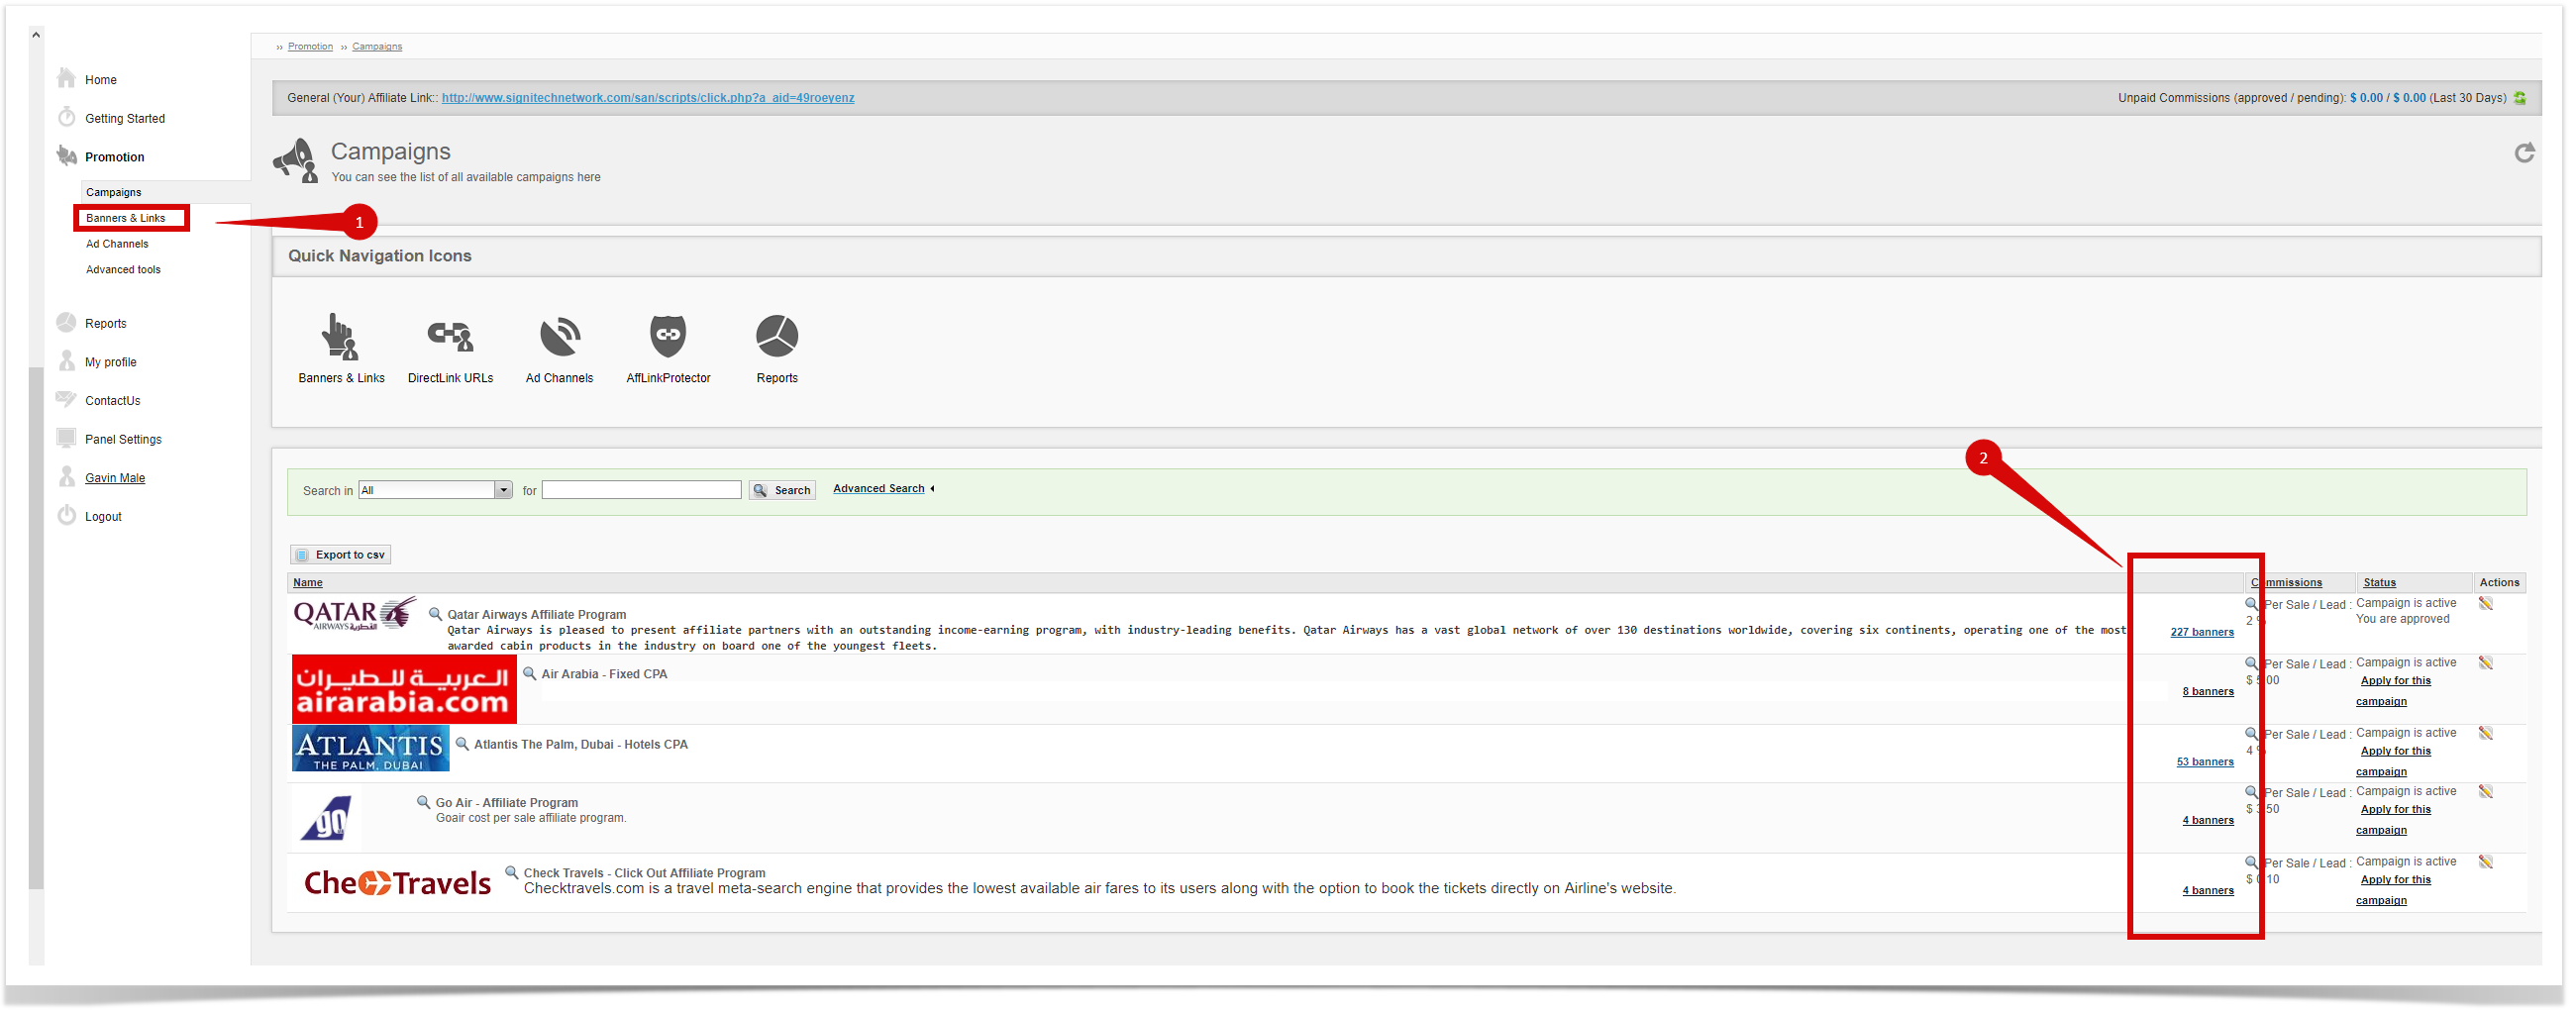
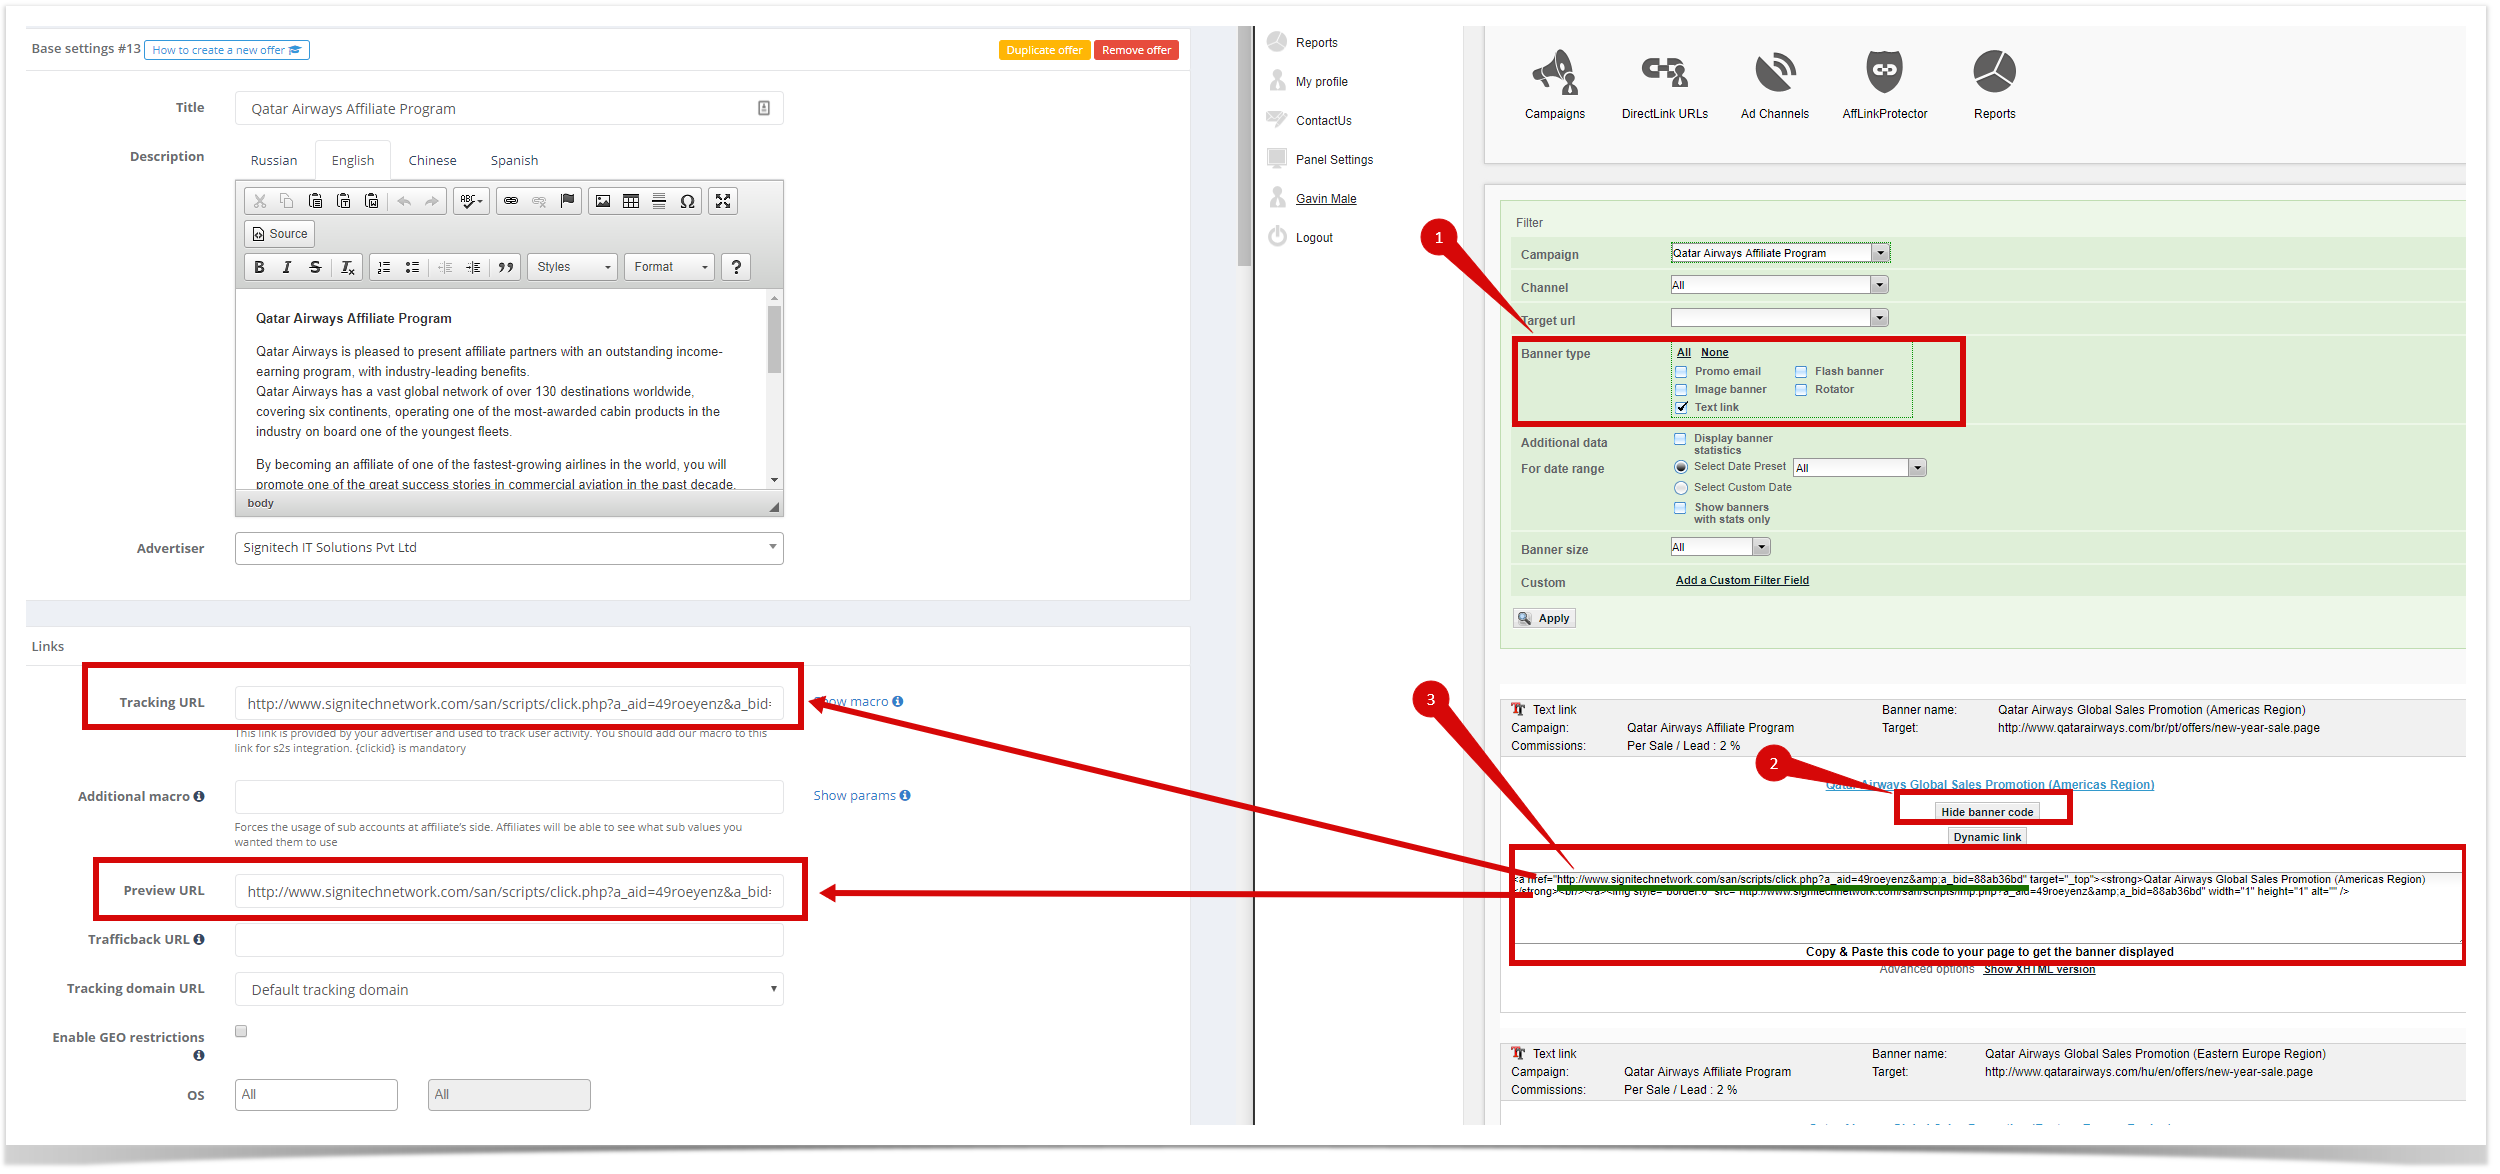
Creatives can be accessed from the menu (1) or from the campaigns table (2):
The tracking link
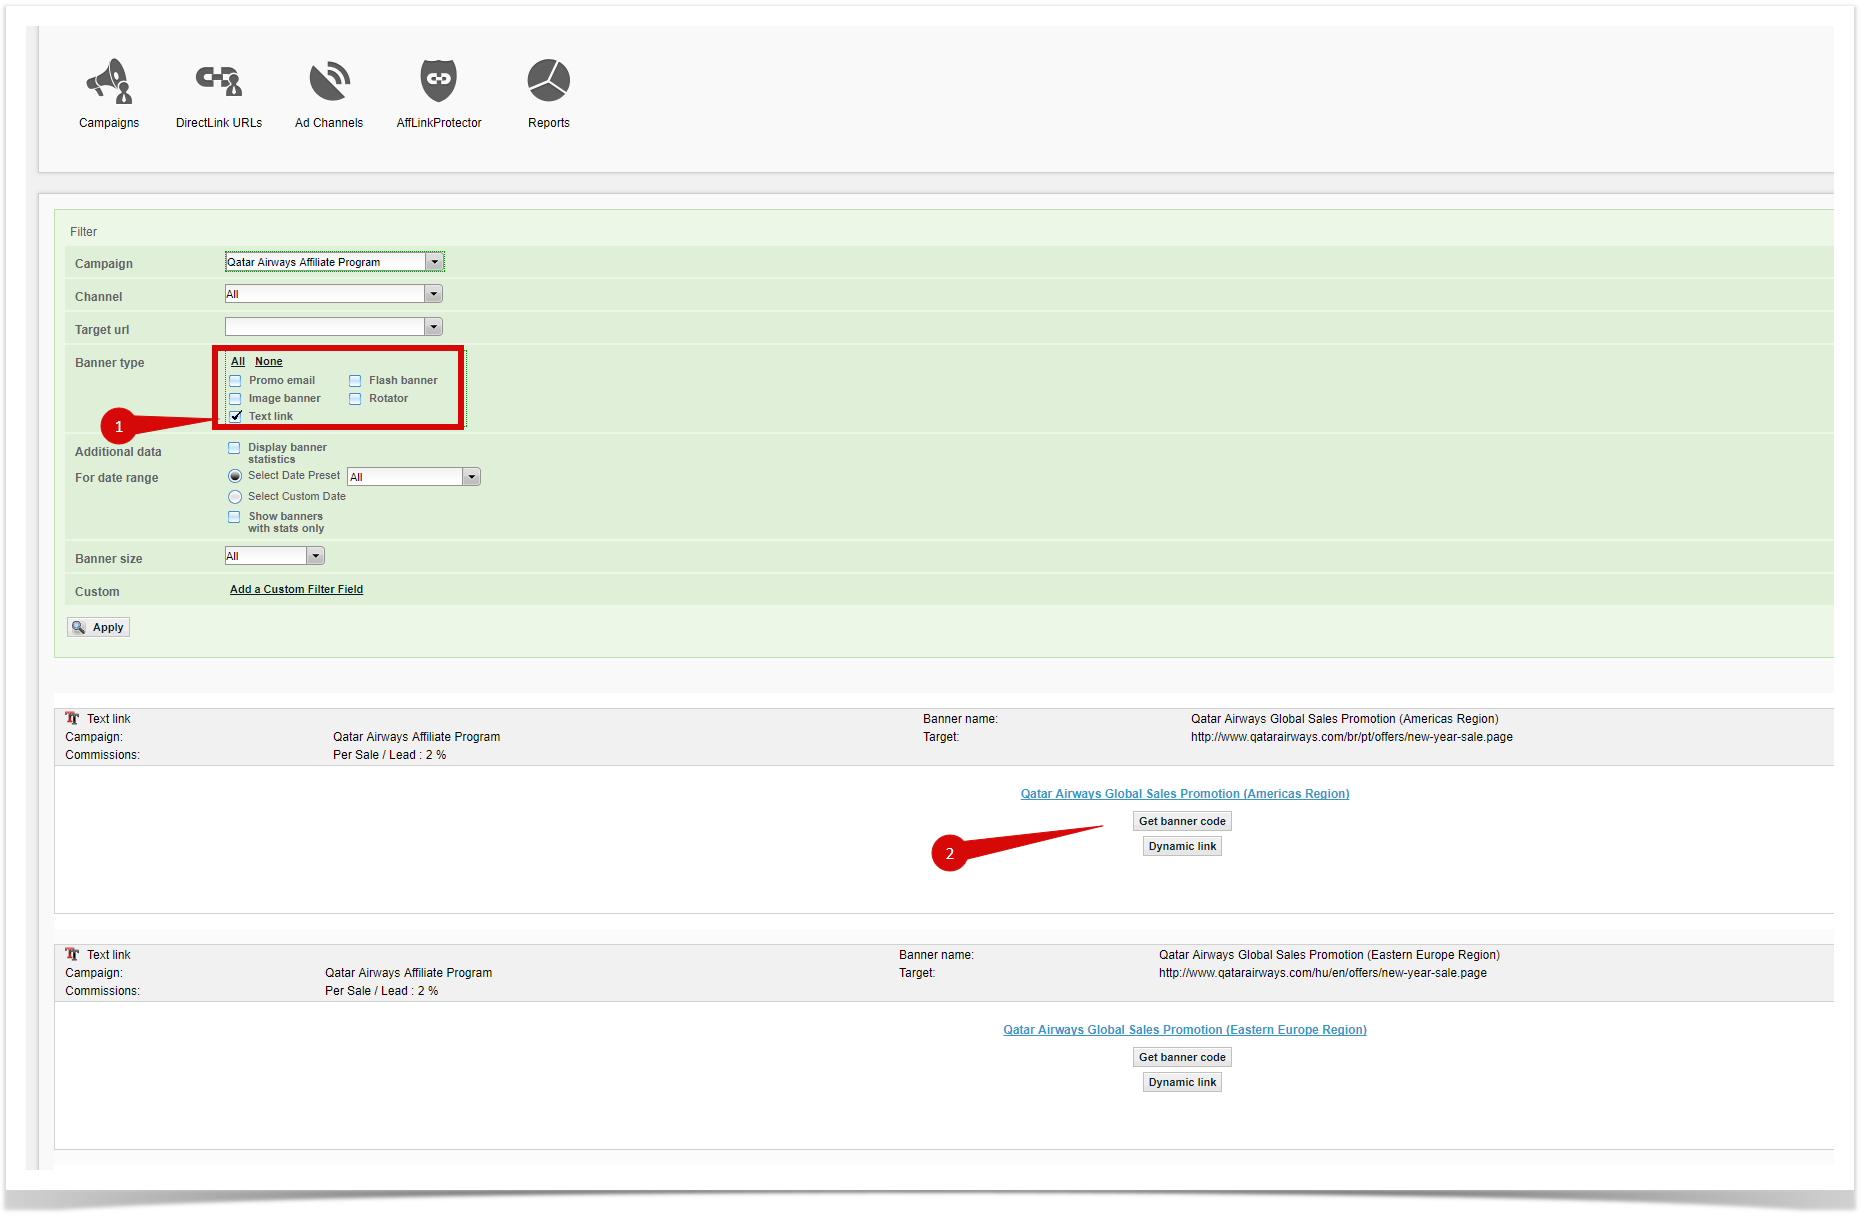
Tracking link can be found from the text ads:
There is an example link:
SubID
SubID tracking can be made using Channels. For additional tracking, you can append up to two custom parameters data1 and data2 to the link URL.
These parameters will be transferred also to the tracked commission, so you will know exactly what link led to the commission.
There is an example link:
Creating the new offer in the SLICE Digital Network
Base settings
Take offer title and description from the campaigns page:
Links
Take the link from ads section (text type (1)) and insert it into Tracking link URL and Preview URL fields:
For tracking link URL add subids as following:
&data1={clickid}&data2={pid}
The tracking link will be:
Settings
From contract.
Payouts
This is important to fix all goal ID's as far as it will be specified inside Impact Radius postbacks/pixels.
Conversion limits
From contract.
Affiliates
Enable/disable connected affiliates:
Landing pages
Adding landing page if required. See the links section above.
Creatives
Can not be downloaded from Post Affiliate Pro.
Other settings
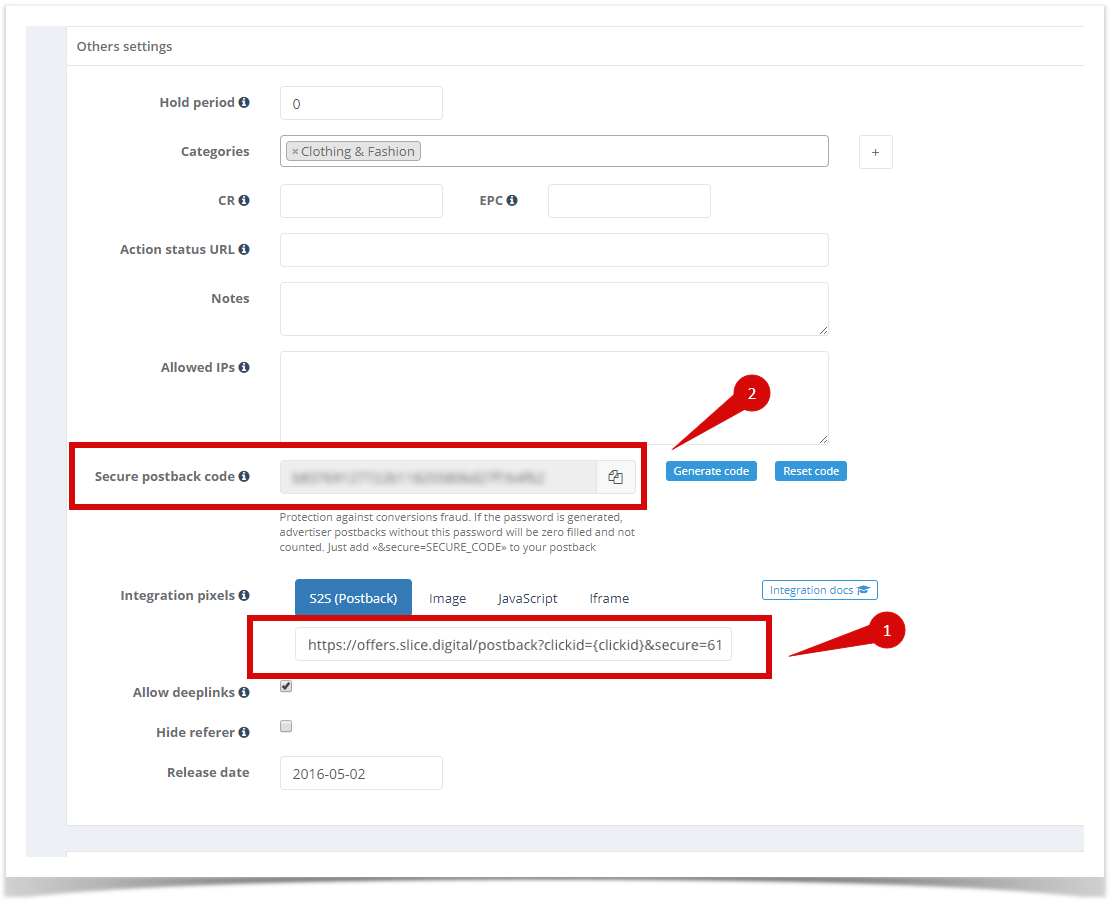
The most important parameter here is "Hash password". This parameter is used to authorize postback from Impact Radius.
Setup tracking
SLICE Digital
Take Image pixel from SLICE Digital network:
The image pixel is the legacy client-side tracking option for your account, and was one of the first options in tracking conversions in the industry. In most cases, the iFrame pixel option is recommended simply because it is the most compatible with other tracking systems. The image pixel tracking protocol is usually used for offers in other tracking systems that do not support other tracking methods. Below is an example of what an offer image pixel:
<img src="//track.slice.digital/success.php?afid=XXXX&afgoal=XXXX&afprice=XXXX&afsecure=xxxxxxxxxxxxxxxxxxxxxxxxxxxxxxx&afcurrency=NZD&afua=&afcomment=" height="1" width="1" alt="" />
where:
Mandatory parameters - advertiser MUST set it up:
- afid - unique request ID on advertiser's side
- afprice - payout for conversion
- afgoal - goal ID provided by S.L.I.C.E. Digital manager
- afsecure - security hash provided by S.L.I.C.E. Digital manager
Optional parameters - advertiser MIGHT set it up:
- afcurrency - order currency (NZD, USD, GBP, EUR, etc.)
- afua - user-agent
- afcomment - comment (any additional information advertiser can pass)
Use this tracking code for Post Affiliate Pro setup.
Post Affiliate Pro
Go to actions:
Add the image pixel from the SLICE Digital section above:
Select "Show Html in client's browser" (2) and add/replace some parameters:
- afid={$orderid} - Order ID
- afprice={$totalcost} - Order amount
- afcomment=[ProductID: {$productid}; Visitor ID: {$visitorid}; Transaction ID: {$transactionid}; Status: {$status}; Status Code: {$statuscode}; IP: {$ip}; Country: {$countrycode}; Referer: {$refererurl}] - Order details
The example of pixel:
<img src="https://track.slice.digital/success.php?afid={$orderid}&afprice={$totalcost}&afcurrency=USD&afgoal=sale&afsecure=b9f71a15a0559087655651c2b2dbb589&afcomment=[ProductID: {$productid}; Visitor ID: {$visitorid}; Transaction ID: {$transactionid}; Status: {$status}; Status Code: {$statuscode}; IP: {$ip}; Country: {$countrycode}; Referer: {$refererurl}]" />
